Tuesday September 13th, 2016

Kitchen DIY renovation in the middle of August (and 2 give aways!)

kitchenrenovation

So, I didn’t go on vacation in August. And you know, August in Greece is a quiet month that gave me plenty of time to think. And what does thinking give us? Ideas! And what happens when you have a lot of free time? Ideas turn into action!!

The truth is that my kitchen, even though it’s big and all, it was so badly designed. No space to cook. And I really like cooking! So I was thinking to actually change the whole thing, and do a proper renovation (paid and everything), but that requires money. And there is ABSOLUTELY NO WAY that I could gather that much money! At that point (the point when you do the budget on such a thing), it hit me “What kind of a DIYer am I, that I can’t solve a problem on my own?” So, on a Friday afternoon I left work, went to Praktiker store and bought all I needed for my evil plan.

Let me show you!

The 2 main problems that made this kitchen a disaster, were these: First, it has no benches, so this made cooking a nerve wrecking thing. Second, the fridge was right next to the kitchen (not so smart folks) and that made it an ecological disaster. I mean, think how much the fridge (and my energy bill!) tried to keep things cool when the oven was on. So, the target was to face these 2 problems.

kitchen_before1

The plan was to switch places among the bench on the left and the frigde. But that was not so simple because the bench was too big to fit and the fridge was too tall and didn’t fit because of the kitchen cabinets. But as a true DIYer, I wasn’t scared! I cut the bench and removed the cabinets so the fridge would fit (OK, the fridge is rather big but I love it and it’s not broken yet!)

After I made sure everything fits, painting process began!

For starters I had to sand down everything. EVERYTHING. Ask my neighbors, they’ll tell you! After that I had to prime the wood. I bought Praktiker primer.  I thought I would need more, but the small box was just fine. For painting I used enamel paint, Praktiker again since it’s cheeper than all the rest (enamel paints are rather expensive) and I used it for Andriana’s tables and I really liked it. I had a white sugary one and a retro mint green mixed. To tell you the truth, the original plan was to use the sugary one for the whole thing, but when I ran out of paint and had to get some more, I decided to experiment! You should definitely experiment with colors, it’s so much fun!

kitchen_renovation2

kitchen_bench_after2

Somewhere between the process.

kitchen_renovation3

Besides the kitchen, there was the dining table. I wanted to make it a little more “posh”. I had painted it years back with enamel paint, but I got a little bored of it so….

Paint remover my friend. Pay attention to the instructions!

dining_table_before1

After I removed as much paint as I could, I sanded it.

dining_table_before2

dining_table_before3

And finally, I polished it with coloured polish.

That’s it! The renovation took me 4 days and the table 1 day. All in all, costed less than 50 euro, and that is something! Cha ching!!!

dining_table_after

kitchen_affter1

(OK, I have to fix the wall above the fridge, but I can’t right now, I am soooo tired!

kitchen_after2

I used an old ladder of bunk beds we had for hanging towels. I’ll paint this too at some point.

kitchen_after3

kitchen_after4

kitchen_after5

At night!

kitchen_after6

kitchen_after7

I don’t know, maybe it doesn’t look much, but to me, it has made a huge difference. The bench problem is solved and now it’s so much more comfortable to cook in. Also I love how the colors brightened up the place. And finally, I’ll admit it: I am so proud it Did It Myself!

And, as promised, Praktiker and JUST DIY have a contest for you! 

  1. You need to become a fan of JUST DIY on Facebook as well as Praktiker.
  2. If you want you can also follow the JUST DIY Instagram account. If you don’t want to, it’s OK. I still like you.
  3. Write your comment below (hopefully a good one!) and please give your name correctly
  4. Win Praktiker vouchers of 50 € to buy paints and accessories. <3

The give aways are 2 checks of 50€ from and the winners will be announced here and on the FB page, next Tuesday (20/9) in the afternoon.

Best of luck to everyone!!!!

PS. For the foreign readers, kindly note that the contest is only valid in Greece. 🙂  

Monday August 29th, 2016

Things are happening!

LISTEN UP! LISTEN UP!

Yes, yes, marvelous news! The blog is renewed! It’s renovated! And is now sunnier and airy! It’s got new features, new categorization, (check on the left the images and the occasions) and… ENGLISH! Yes! The blog is now bilingual! 😀

blog

This has been a very busy August.

My beloved cousin mrpc,  set up the new blog and made true all of my thoughts and more that that! There are more changes to been done but I couldn’t wait one more day!

I translated a good percentage of the posts in English. (more to follow though)

I renovated my kitchen. I’ll have a post soon about the most epic DIY I have done and also I’ll host a competition!!

I have activated the blog’s intagram account

and…

I’ll participate in the Berlin Maker Faire with Dremel on the 1st of October!  4 people from Europe (Italy, Finland, Germany & Greece) will be making a project during the Faire and there also going to be live streaming so you don’t miss a thing! Check this out! http://dremelmakerday.net/ 

14066265_1082514738451528_9108448311298287067_o

I don’t want to reveal anything about the project, but I am soooo excited! 

That’s it from me. I hope you like the new blog and all the news. Stay tuned.

Tuesday May 31st, 2016

How a kid’s drawing can make you change the deco! (part 2)

Part two! (if you haven’t read the first part, find it here )

So, where were we? Yes, so I was trying to find a spot for my nephews masterpieces. I thought about it and decided to put them above my home office. BUT it was a complete mess… so move A, I finally cleaned up the chaos and move B, started decorating. (all of these things happened in 3 hours on Thursday night)

Here it is. 🙂 In the center, above the screen you can see Leonardo.

homeoffice

The second one, the one with Jack Skellington, took its rightful place in the Tim Burton Display Cabinet.

TimBurton

You see, the home office is the first thing you see when you enter the house. So, when it’s a mess it messes you up too! And, since I am speaking about a messy and bad mood… After I was done with the home office and was so excited it about it, I suddenly turned around and saw…………………….

THIS.

(well, when tidied up it looked OK but it was tidied up around 3 times a year…I don’t wanna lie to you, it had to go)

before

My decisions were fast (and a little furious). Remove the old hanger from behind the door. Paint wall half white. DIY simple bench. And placement of white little hangers on the black part of the wall. I started Friday night with the wall painting and was done with the whole project by Saturday evening. Not bad, right?

after

after1

after2

Apart from the fact that we now have more space, one of the advantages of this change is that I am forced to tidy up my stuff, and not just leave everything everywhere!

Monday May 30th, 2016

How a kid’s drawing can make you change the deco! (part 1)

All changes start from something small. At least my home changes. For example, I make a small deco item, then I don’t know where to put it and then I turn the house upside down just to find a place for my new item.

That’s exactly what happened with this project. All began with the idea I had of framing my nephews’ drawings. So, Yorgos is 6 years old, and he drew 2 things for me on the trip I took to New York a little while back (My brother lives there with his family).

Naturally the first drawing is Leonardo for Teenage Mutant Ninja Turtles (FOR CRYING OUT LOUD, HOW LONG IT TOOK ME TO WRITE THIS) and the second one is Jack Skellington from Nightmare before Christmas (that, I asked for – I showed him my tattoo and said “draw Jack for me!”)


ninjaturtles

JackSkellington

I cut them with a pair of scissors roughly and stuck them on black background and then in a frame.

ninjaturtles2jackskellington2

ninjaturtles3jackskellington3

And after I made them and was so proud for my nephew I freaked. “NOW WHERE WILL I PUT THESE WORKS OF ART???”

…to be continued with the epic before & after of the house entry way.

Sunday April 10th, 2016

A big company in Xeirotechnika Athens

xeirotexnika_main

This was the second time I was invited to participate in Χειροτέχνικα to host a DIY workshop. The first time was last October were we made a cement vase while this time we also made a vase (really, vases don’t really mean anything special to me, it’s just a coincidence) with wood and glass bottles. And you know, DIY is better with friends so I invited my friends ikariastore.gr and  Black+Decker for help and they came to my assistance!

Black+Decker brought all the tools we needed while ikariastore.gr brought for us the necessary glass bottles (filled with traditional ikarian lemonade and orangeade I <3 Ikaria) to complete the project.


First thing we had to do was to drink the refreshments and get to know each other!

xeirotexnika1

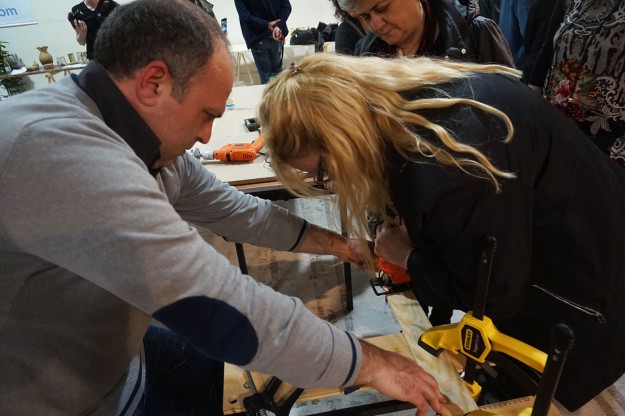
Then we had to cut the wood. Yannis from B&D was there to help, so both of us showed the participants how to use the saw. xeirotexnika3xeirotexnika4xeirotexnika5xeirotexnika6xeirotexnika7

Then we had to glue the wood together and create the Π shape. xeirotexnika7b

Some pieces of wood needed a little sanding. xeirotexnika8xeirotexnika9

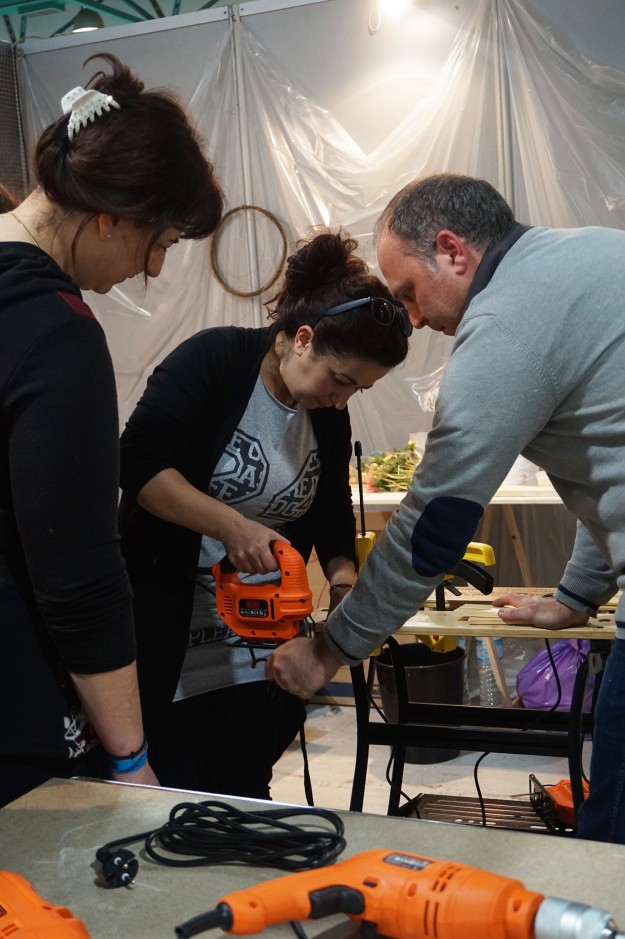
Then we had to open the holes in the wood, with holesaws. xeirotexnika10xeirotexnika11xeirotexnika12xeirotexnika13

At this point I need to say that I finally had my cards printed! Design by mr Belias of course. xeirotexnika14

xeirotexnika15

A! Flowers! xeirotexnika16

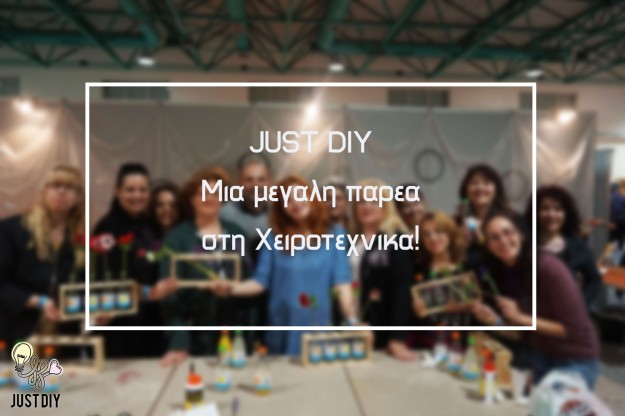
We finished the vased, put our flowers in and took a “family photo” 🙂 xeirotexnika17

Special thanks to Yannis from B&D. We’d still be there if it weren’t for him. xeirotexnika18

And of course, special thanks to my man who took pictures of the whole thing and made us look good!